Branch and merge challenge: Ko Wai Koe
Learning Competencies
By the end of this exploration, you should be able to:
- Create a new branch on a cloned repo
- Pull down changes
- Merge changes
Summary
In this challenge, you will test your knowledge of Git branch workflow.
Time Box
| Activity | Time |
|---|---|
| Challenge | 30 minutes |
Repos within repos
Important! Make sure you do not clone the new repo (ko-wai-koe) into an existing repo. We recommend creating a 'dev-academy' parent directory (which is not a git repo) that can contain your Dev Academy repos. If you put one repo inside another, it's very easy to get tangled up, and you may end up committing the whole thing somewhere you did not intend. Remember you can use the command rm -rf .git to destroy a git repository if you accidentally created one in the wrong place.
Cloning to the same parent directory is fine, for example:
Example: Good
User/Hemi/Dev-Academy/ko-wai-koeUser/Hemi/Dev-Academy/a-second-git-repoUser/Hemi/Dev-Academy/a-third-git-repo
Example: Incorrect
User/Hemi/Dev-Academy/an-existing-git-repo/ko-wai-koe
Challenge
- Navigate to the Dev Academy Foundations ko-wai-koe repo on GitHub.
- Clone it down onto your machine (not into an existing git repo, see above). When you are asked to enter your GitHub username and password, remember the Personal Access Token you created back in Set Up Accounts/GitHub is what you paste in for the password. Then navigate into the cloned folder.
- Create a branch using your full-name, e.g.
hemi-marton(hint:git branch your-name). - Switch (
checkout) to the new branch. - Create an
.mdfile and save it as your full-name. You can do this all from the command line with one command (e.g.touch Hemi-Marton.md). - Open your file in VS Code and write your mihimihi (a short introduction about yourself), or copy and paste the Ko Wai Koe template (below) with your answers.
- Save your file, stage it, then commit it.
- Check for and pull down any changes to the
mainbranch (the simplest way is to checkoutmain,git pull, and then checkout your full-name branch again). - Push your new branch to GitHub (hint:
git push origin your-name). GitHub is typically ourorigin. - Create a new pull request (hint: go to the repo on GitHub, choose your branch and click New pull request).
- In your Discord Homegroup, ask someone to
mergeyour pull request and delete your branch (it's helpful to give them the link to the pull request in your message). - Checkout
mainand pull down changes.
Template for Ko Wai Koe
Where I grew up:
Where my family is from:
My name:
Resources
- Create Simple Pull Request - YouTube
- Code School Git Real - Cloning and Branching
- Atlassian Git Branching
How to Resolve Git Conflicts
Sometimes when you git pull work into a repo you have been working in, you will find that a file you have been working on has an issue when you pull. This is known as a "merge conflict". Someone else has been making changes to the document too!
In this situation, Git isn't sure which file it should be using and marks the file as a conflict. To resolve this, we need to look at the file and tell Git which piece of code is the one to use.
Steps to resolve a conflict
Figure 1: Pulling from a remote that creates a conflict
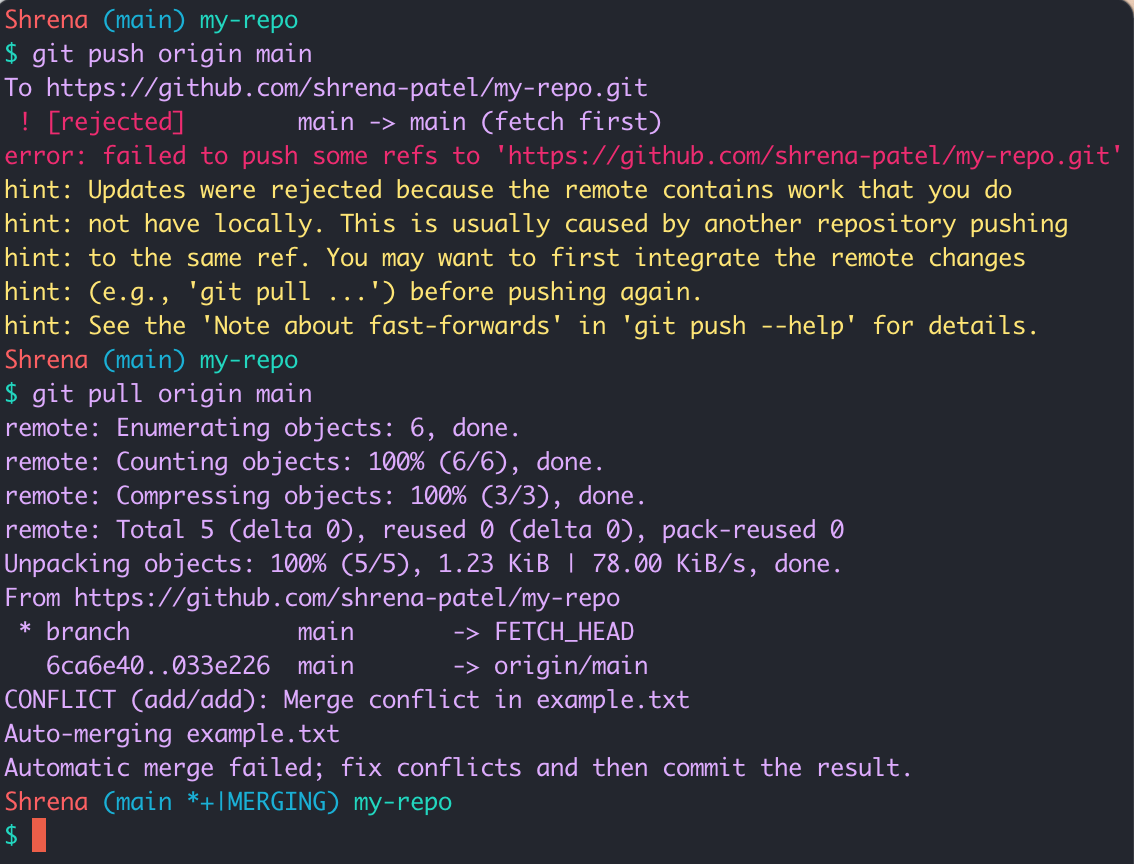
Here Git gives us a polite little message to let us know that there are conflicts in our work; and that we must resolve the conflicts then commit the changes.
Figure 2: Resolving a conflict in your text editor
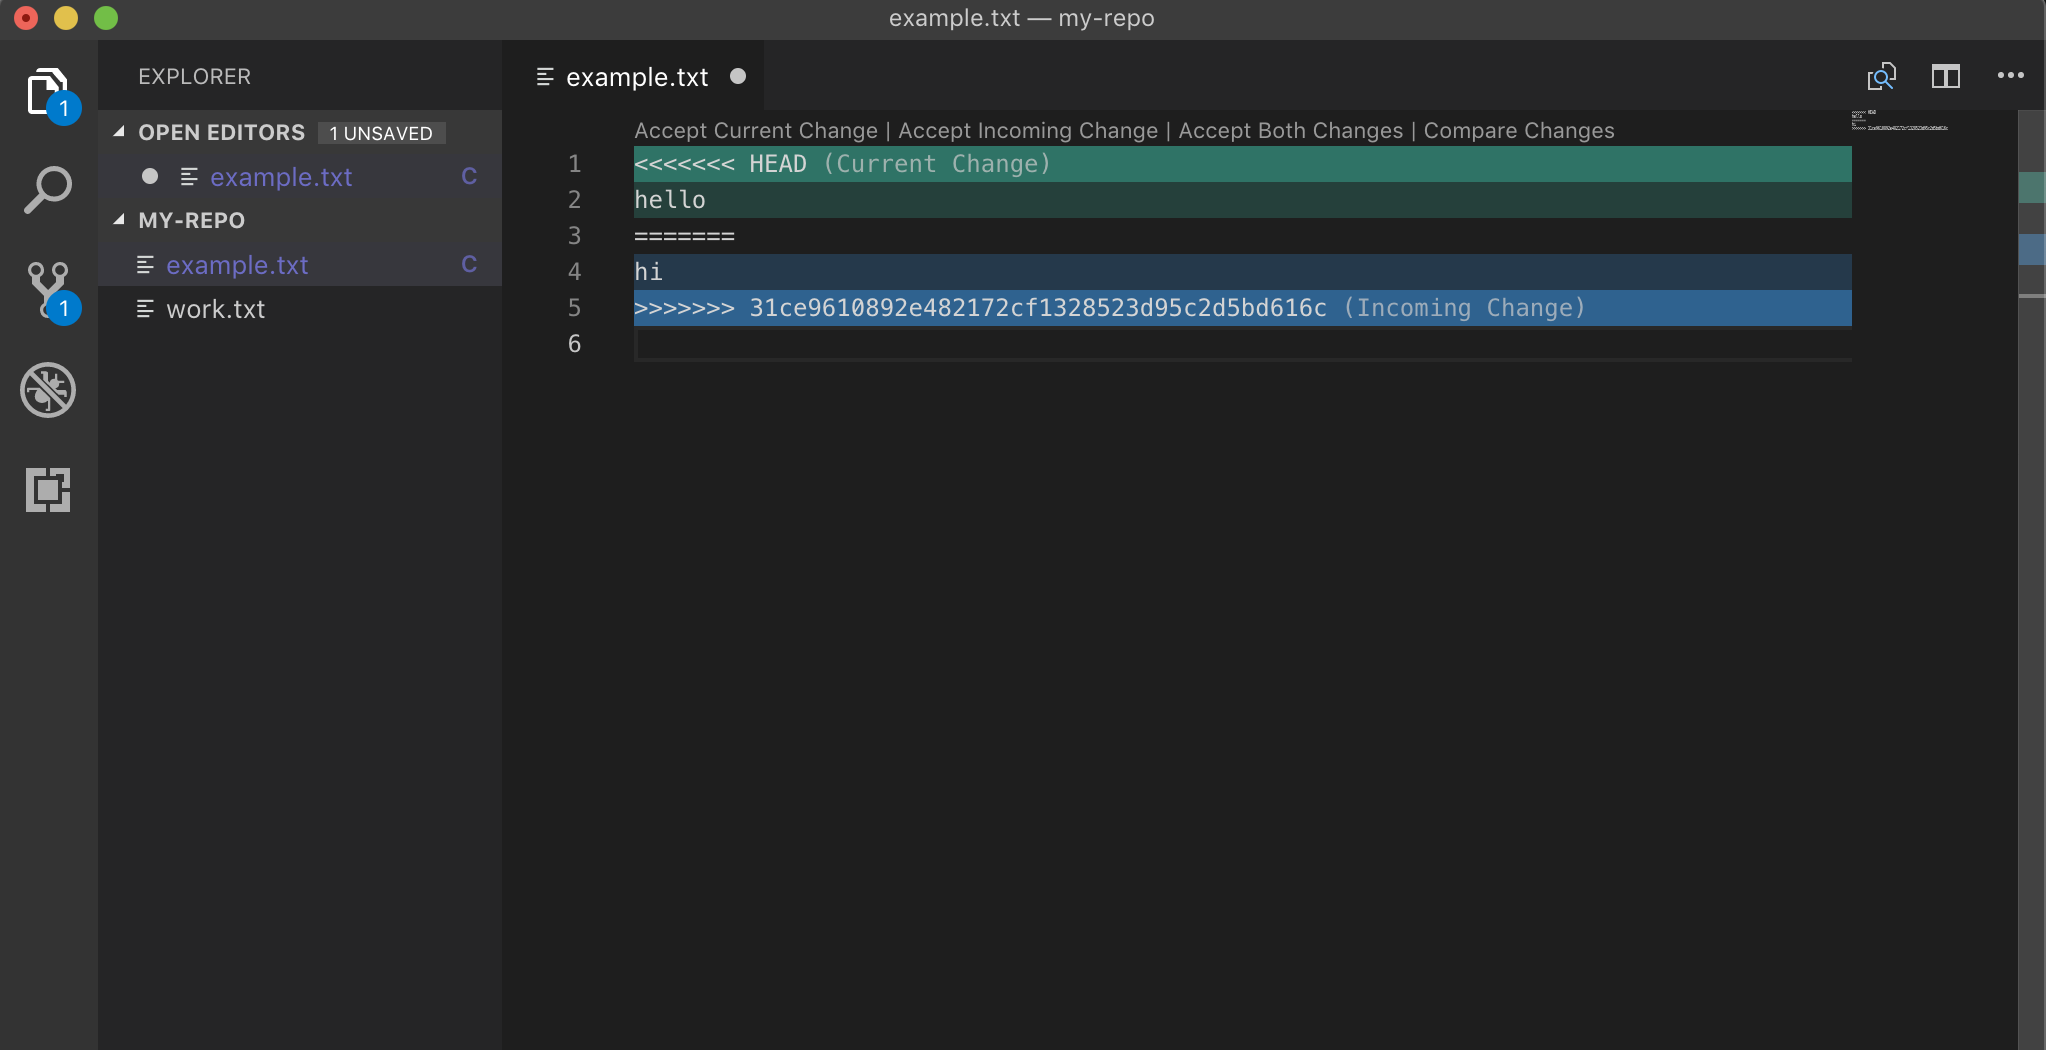
Git once again is helping us out a lot here. It inserts "Head Markers" into our document to signpost for us very clearly where the conflicting changes are. Now it's time to delete the code we don't want.
Figure 3: Pushing the fixed branch back up to Github
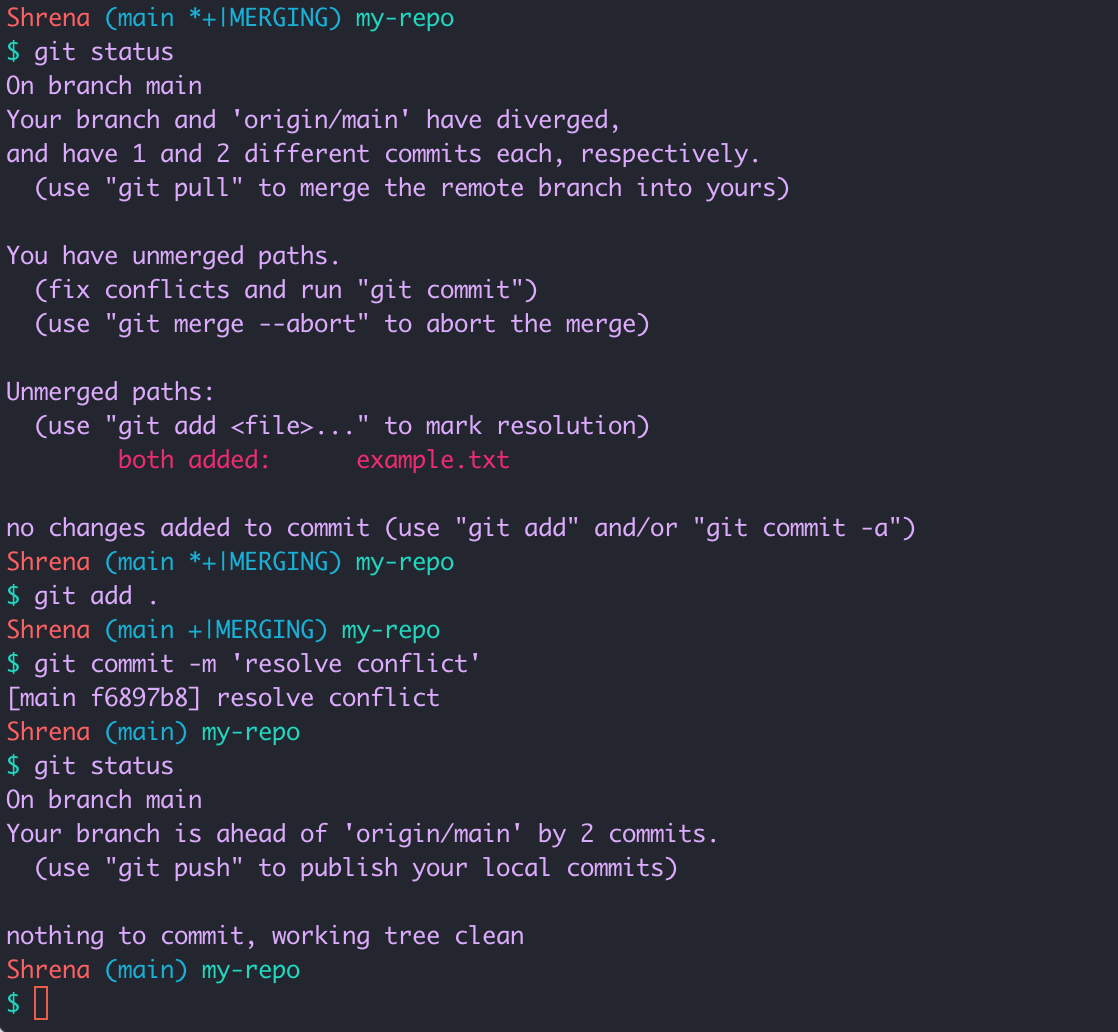
With the unwanted code deleted, now it's just a matter of staging, committing and pushing the beautiful new branch up to Github.
Reminder - Open VS Code from the Terminal
Once you've gone through this setup, you'll be able to type code . to open the whole folder you've navigated to in the terminal, in VS Code. Or code my-file-name.md to open a specific file. It is helpful to be able to open files that you are working on directly from the terminal, instead of having to open it through the GUI (graphical user interface).
When VS Code is installed on a Linux system, the code command is automatically added to the terminal. Mac OS and Windows have different setup methods. Follow the link below and under the heading that matches your machine.
Mac OS
When asked to open the Command Palette in VS Code, press Command + Shift + P.
Code For Command Line InstructionsWindows
When you install VS Code on your windows laptop/PC, the code . command is automatically installed for use.
If you encounter any errors or issues with running this code, check out this article.
Mission complete
Congratulations! You did it! Take some time to celebrate. You made it through this challenge!