Deploying a full-stack web app with a database and authentication
This guide is for deploying full-stack node apps with a React/SPA frontend and an Express backend using a PostgreSQL database and auth0.com authentication.
Add production routes for the server
Import Path in server.ts
import * as Path from 'node:path'
Make sure the following is included in your server.ts file too(underneath your other routes)
if (process.env.NODE_ENV === 'production') {server.use(express.static(Path.resolve('public')))server.use('/assets', express.static(Path.resolve('./dist/assets')))server.get('*', (req, res) => {res.sendFile(Path.resolve('./dist/index.html'))})}
Move pg to dependencies
Render removes devDependencies during build, so make sure the pg package is in dependencies.
npm install --save pg
If you install it in devDependencies (e.g. with -D), your build may fail with a confusing error like “can’t install pg”.
Update knexfile for production
In your knexfile.js, set up the production config to use the database env variables:
production: {client: 'postgresql',connection: {host: process.env.DB_HOST,port: process.env.DB_PORT || 5432,database: process.env.DB_NAME,user: process.env.DB_USER,password: process.env.DB_PASSWORD,ssl: { rejectUnauthorized: false }},pool: {min: 2,max: 10,},},
Add custom build and start scripts
Add these scripts to your package.json:
"render:build": "npm install && npm run build && npm prune --omit=dev && NODE_ENV='production' npm run knex migrate:latest","render:start": "node dist/server.js"
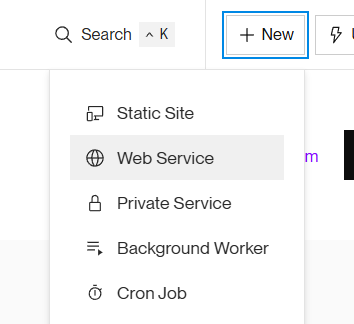
Sign in to Render and create a Web Service
Go to render.com and sign in.
Click “New > Web Service”.
Authenticate your GitHub account if prompted.
You should see a list of repos to choose from. Select the one you want to deploy.
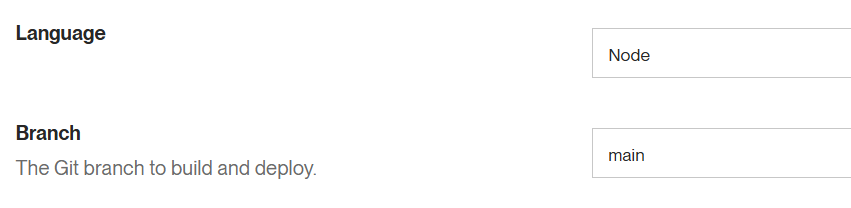
Choose branch and runtime
- Choose Node as the environment
- Select the branch you want to deploy from (Render will auto-deploy from this branch)
- Choose the Free plan!
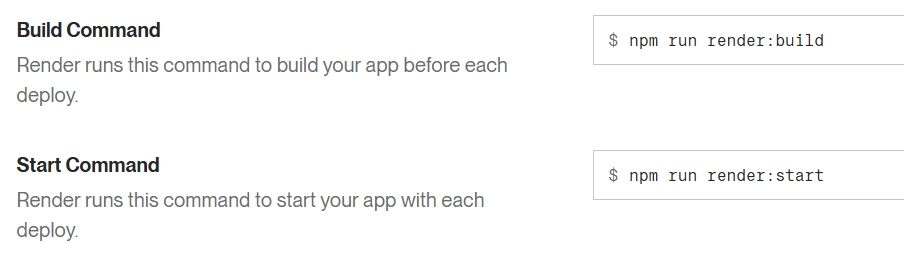
Then set your commands in the Render service settings:
- Build Command:
npm run render:build - Start Command:
npm run render:start
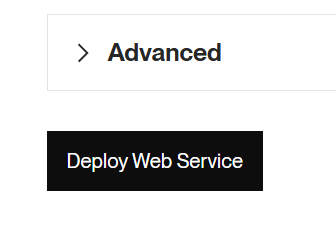
Click Deploy Web Service (Don't worry if you see a Failed message for the deploy at this point)
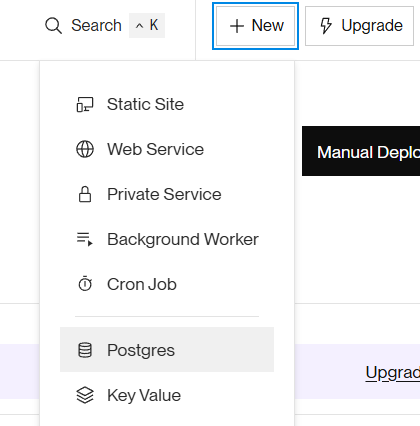
Create a Postgres database
From the Render dashboard, go to “New > Postgres” and create a database using any name you like the default settings for the rest.
Once it’s provisioned, open the Info tab and take note of the following values:
- Hostname
- Database
- Username
- Password

Set environment variables

You can add env vars while creating the service or later from the Environment tab. Click the add button for each new key.
Set the following keys with the values you copied earlier
DB_HOSTDB_NAMEDB_PASSWORDDB_USER

If you are using a .env file in your project, there are some extra steps to complete. We use dotenv for loading environment variables in development, but render can generate errors if we try to import dotenv in production.
To solve that replace any instances of import 'dotenv/config' in your server.ts or routes files with the following code:
if (process.env.NODE_ENV !== 'production') {import('dotenv').then((dotenv) => dotenv.config()).catch((err) => {console.error('Failed to load dotenv: ', err)})}
Then you can add your env vars from the Environment tab.
Seed your database
To run seeds on initial deploy, update your render build script temporarily in the settings:
npm run render:build && NODE_ENV='production' npm run knex seed:run
This will trigger another deployment which runs your seeds
After your seeds have run, reset your build script part so it doesn’t run on every deploy.
npm run render:build
Update auth0 setup
Auth0.com requires the exact address of your deployed site to allow logging in and out.
Got to the settings for your application and add the full deployed url for the allowed callbacks (use a comma to separate it from the localhost address in each of the boxes.)
That’s it!
Once your deploy completes, Render will show you the URL to your live site 🎉