Branch and Merge Challenge: Ko Wai Koe
The Big Idea
This is your first real Git workflow challenge. You will clone a shared repo, create your own branch, write a short introduction, and open a pull request for a teammate to merge. By the end you will have completed the full branch → commit → PR → merge cycle.
⚑ This task is assessed — FND01 Git and Terminal This challenge demonstrates your Git workflow. Your branch, commits, and merged PR are all part of your assessment evidence. Once your PR is merged, you submit the link in the Assessment Tracker (AT) — see Submit via AT below.
Your Roadmap
| Section | Time | Required? |
|---|---|---|
| Before you start | 5 min | ⚑ Required |
| Challenge steps | 25 min | ⚑ Required |
| Submit via AT | 5 min | ⚑ Required |
| Resolving merge conflicts | Reference | ◎ Optional |
Before you start
Do not clone this repo (ko-wai-koe) inside an existing Git repo. If you do, the two repos will conflict and things will break. We recommend creating a 'dev-academy' parent directory (which is not a git repo) that can contain your Dev Academy repos.
Create a parent folder that is not a Git repo, and clone everything into it:
Dev-Academy/ko-wai-koe/git-test/git-test-2/
Not this:
Dev-Academy/git-test/ko-wai-koe/ ← wrong
If you accidentally create a repo in the wrong place, run pwd to confirm your location, then rm -rf .git to remove it.
Challenge steps
1. Clone the repo
Go to your cohort's repo: ko-wai-koe — select your cohort in the top-right corner of this page to see the link. On the repo page, click the green Code button and copy the SSH URL.
Clone it to your machine and navigate into it:
git clone <paste the SSH URL you copied>cd ko-wai-koe
2. Create your branch
Use your full name in lowercase with a hyphen:
git checkout -b hemi-marton
3. Create your file
touch hemi-marton.mdcode .
Open the file and write your mihimihi — a short introduction about yourself. Use this template if you like:
Where I grew up:Where my family is from:My name:
Save the file — Cmd+S on Mac, Ctrl+S on Windows/Linux.
4. Stage, commit, and push
git add -Agit commit -m "Add hemi-marton intro"git push origin hemi-marton
5. Pull the latest main
Before opening your PR, download any changes your teammates may have pushed to main. This keeps your branch up to date and reduces the chance of a merge conflict:
git checkout maingit pullgit checkout hemi-marton
6. Open a pull request
Go to the repo on GitHub. You should see a prompt to open a pull request for your branch. Click it, add a short description, and submit.
7. Ask someone to merge it
Post the link to your PR in your Discord Homegroup and ask a teammate to review and merge it.
8. Pull the merged changes
Once it is merged, pull it down so your local main stays up to date:
git checkout maingit pull
Submit via AT
Once your PR is merged, submit the link to your PR in the Assessment Tracker (AT) — find FND01 — Git and Terminal and work through the Requirements checklist there. New to AT? See Assessment and Completion for what to expect.
How to know you've nailed it
| Level | You can... | ||
|---|---|---|---|
| 🪨 | Intro Climb | Clone the repo, create your branch, and push your file | ⚑ Required |
| 🧗 | Core Ascent | Open a PR, have it merged by a teammate, and submit the link via AT | ⚑ Required |
| 🏔️ | Summit | Pull the merged changes back to your local main and explain each step you took | ◎ Optional |
Resolving merge conflicts
Merge conflicts happen when two people edit the same part of the same file. Git does not know which version to keep, so it stops and asks you to decide. This is normal — every developer hits merge conflicts. It is not a mistake, it is just part of working with others.
Step 1 — Git tells you there is a conflict
When you run git pull and a conflict exists, you will see something like this in your terminal:
Figure 1: Git warning you about a conflict after pulling
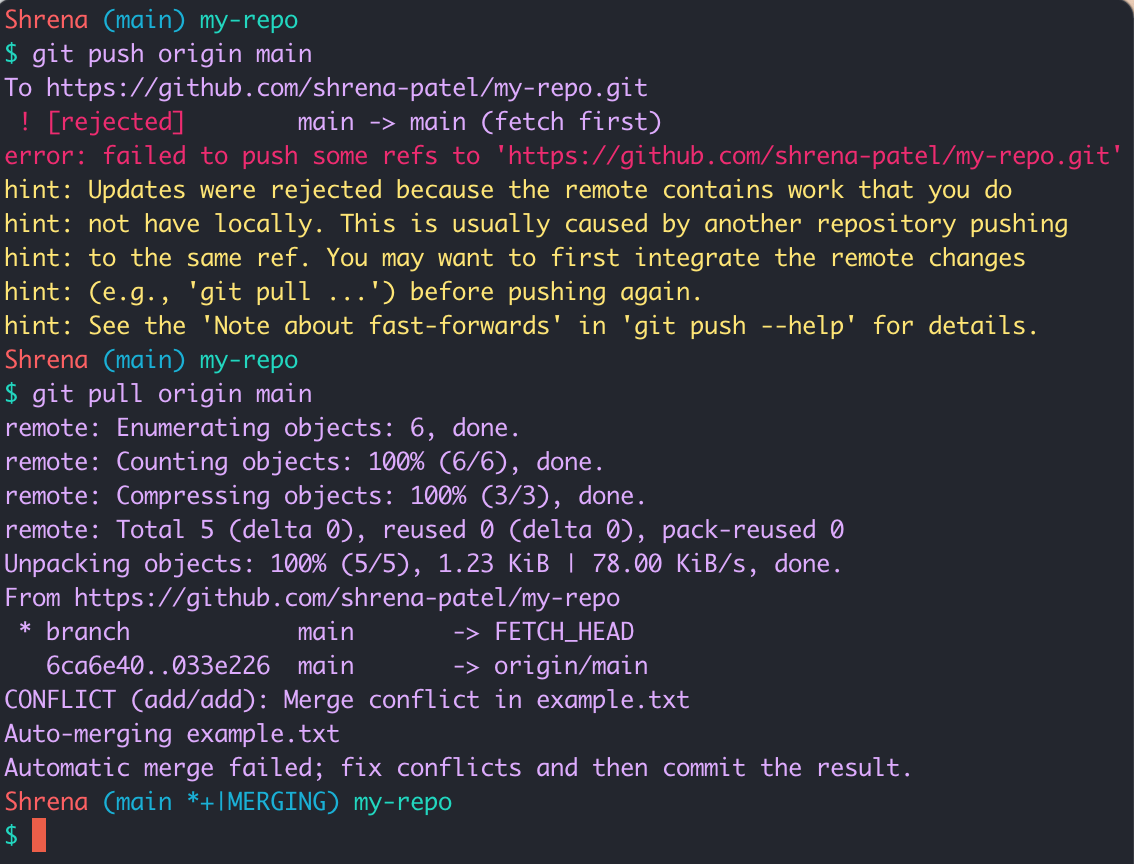
Git is telling you: there are conflicts, and you need to resolve them before committing.
Step 2 — Open the file and find the conflict markers
Open the conflicting file in VS Code. Git has inserted markers to show you exactly where the conflict is:
<<<<<<< HEADYour version of the text=======Someone else's version>>>>>>> branch-name
<<<<<<< HEADmarks the start of your version (HEADmeans your current branch)=======separates the two versions>>>>>>> branch-namemarks the end of the incoming version
Here is what it looks like in VS Code:
Figure 2: Conflict markers shown in VS Code
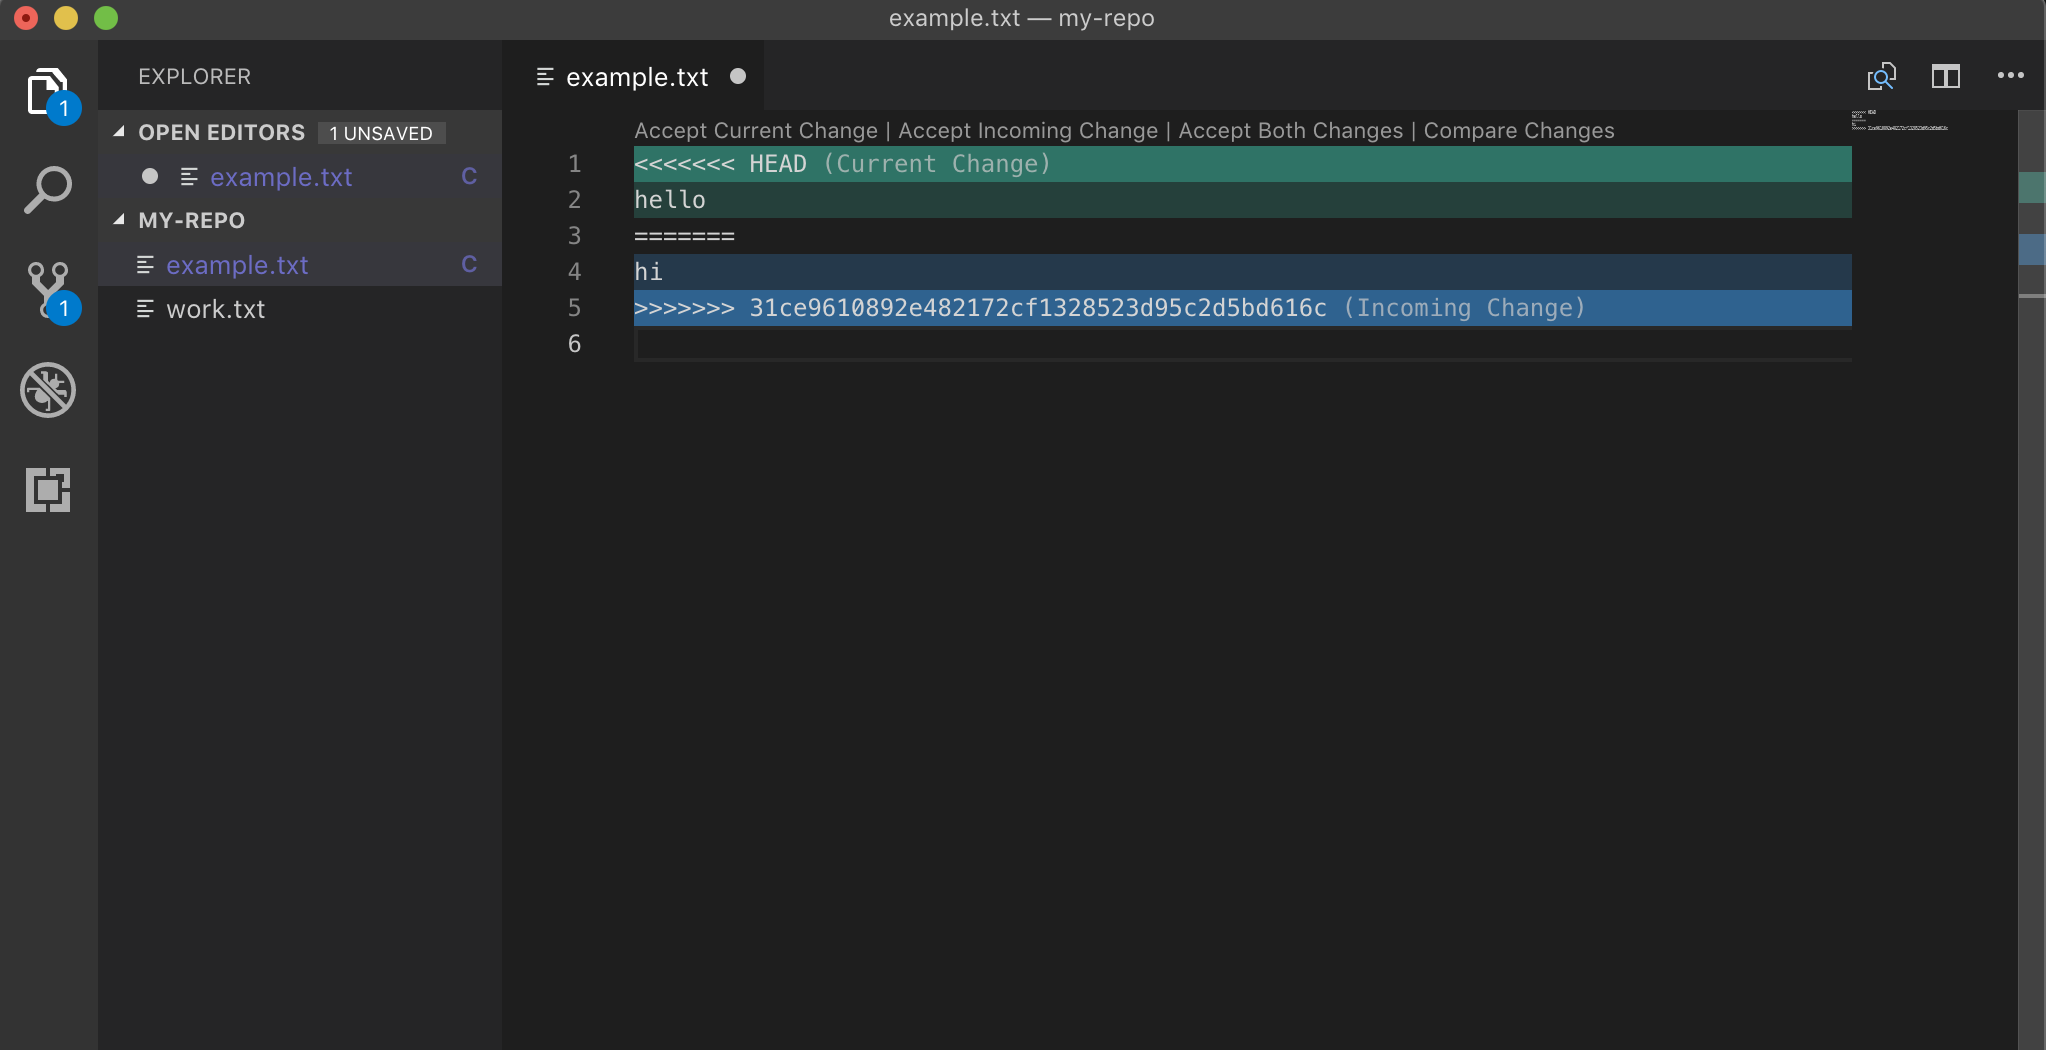
VS Code also highlights the conflict and gives you clickable options at the top: Accept Current Change, Accept Incoming Change, or Accept Both Changes. You can click one of these instead of editing manually — both approaches work.
Step 3 — Fix and push
Once you have decided which version to keep:
- Delete everything you do not want, including all three markers (
<<<<<<<,=======,>>>>>>>) - Save the file — Cmd+S on Mac, Ctrl+S on Windows/Linux
- Stage, commit, and push:
git add -Agit commit -m "Resolve merge conflict"git push
Figure 3: Pushing the resolved file back to GitHub
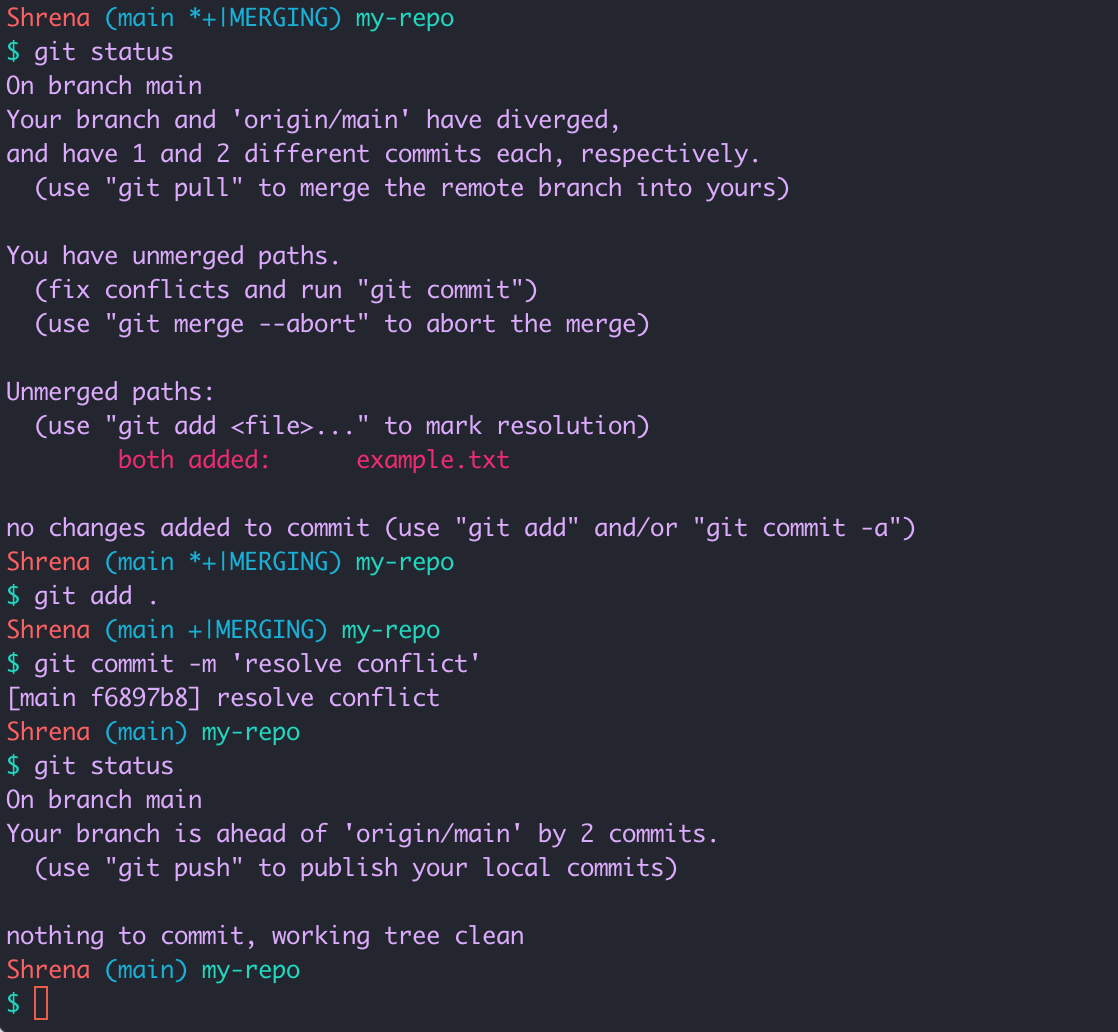
The conflict is resolved. Your branch is clean.
The Big Idea (revisited)
Branch → commit → push → pull request → merge. You have now done the full cycle. This is the workflow you will use every day at Dev Academy and in most development jobs.